Product
OKTA Customer Identity and Access Management (CIAM)
Objective
This document provides details of migration of SiteMinder OIDC applications to Okta CIAM tenants.
Details
Below are the steps to configure OIDC applications in Okta.
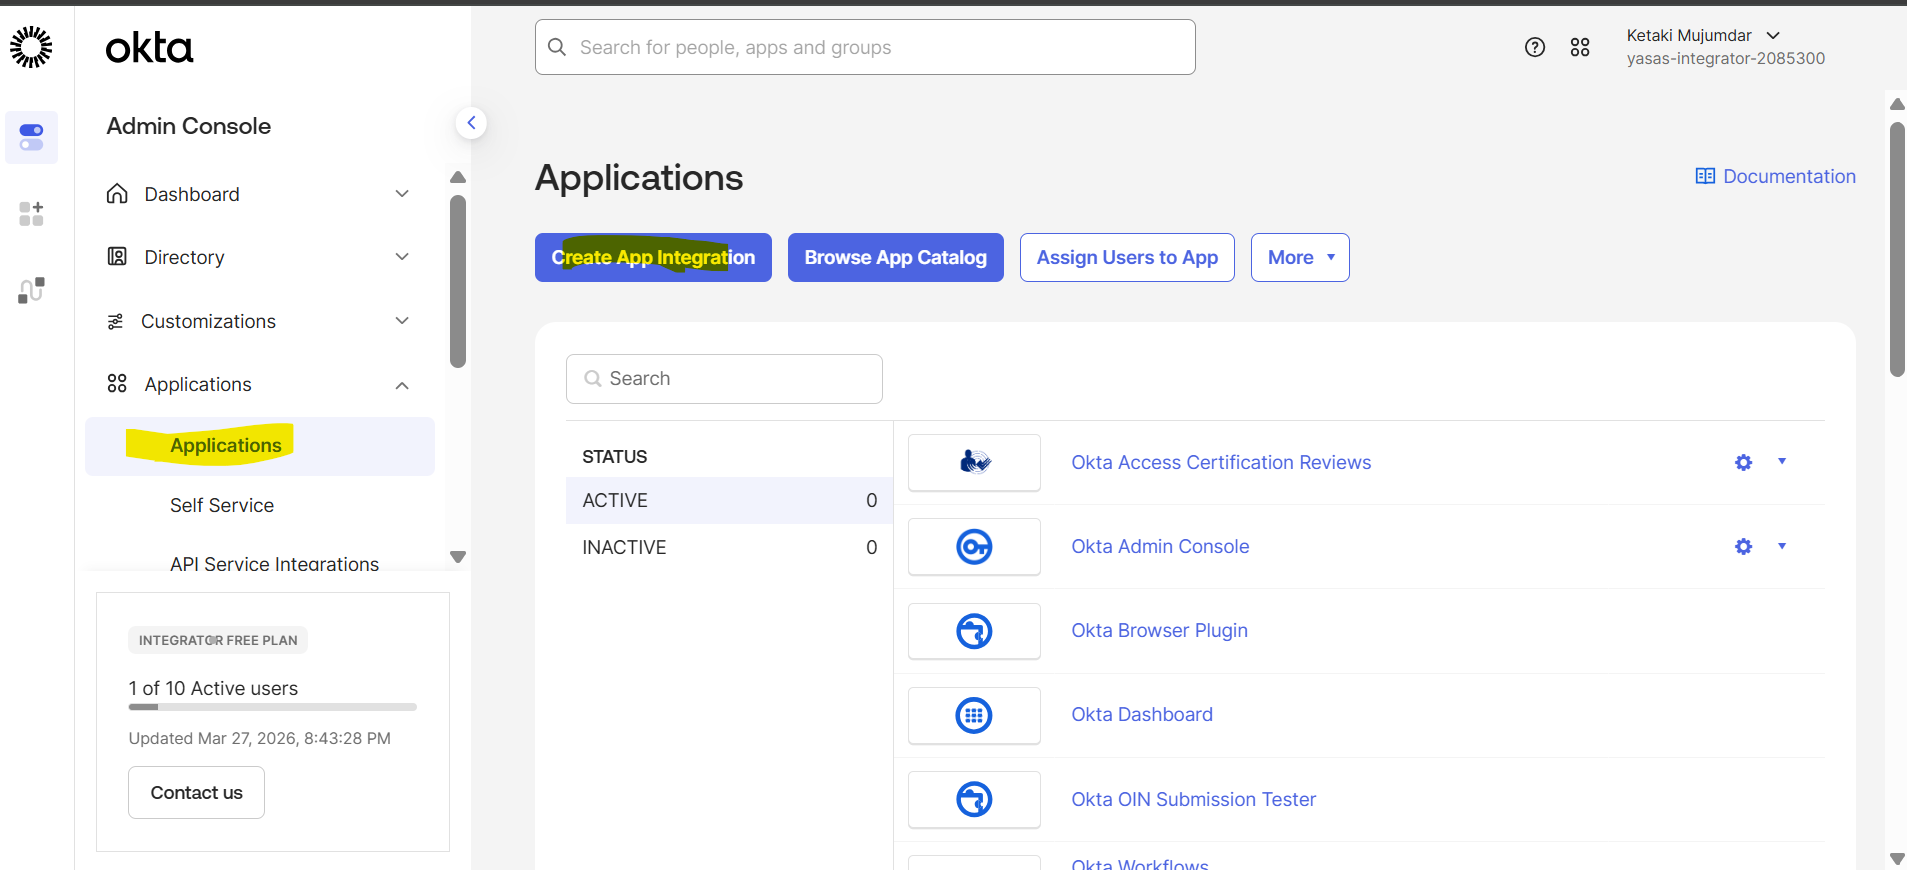
- Login to OKTA Admin Console
- Navigate to Application -> Applications
- Click Create App Integration
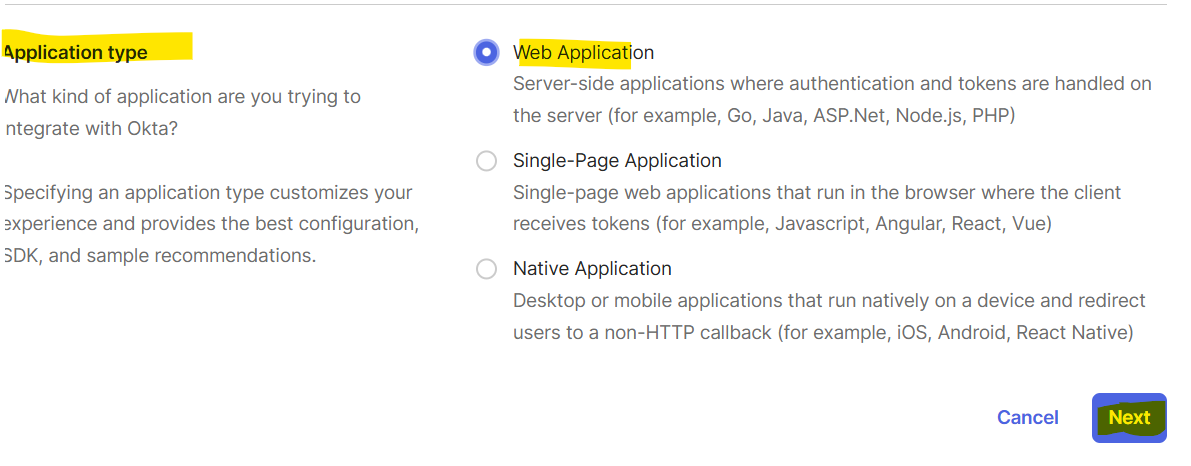
- Select OIDC – OpenID Connect as the application integration type

- Select Application Type as Web Application
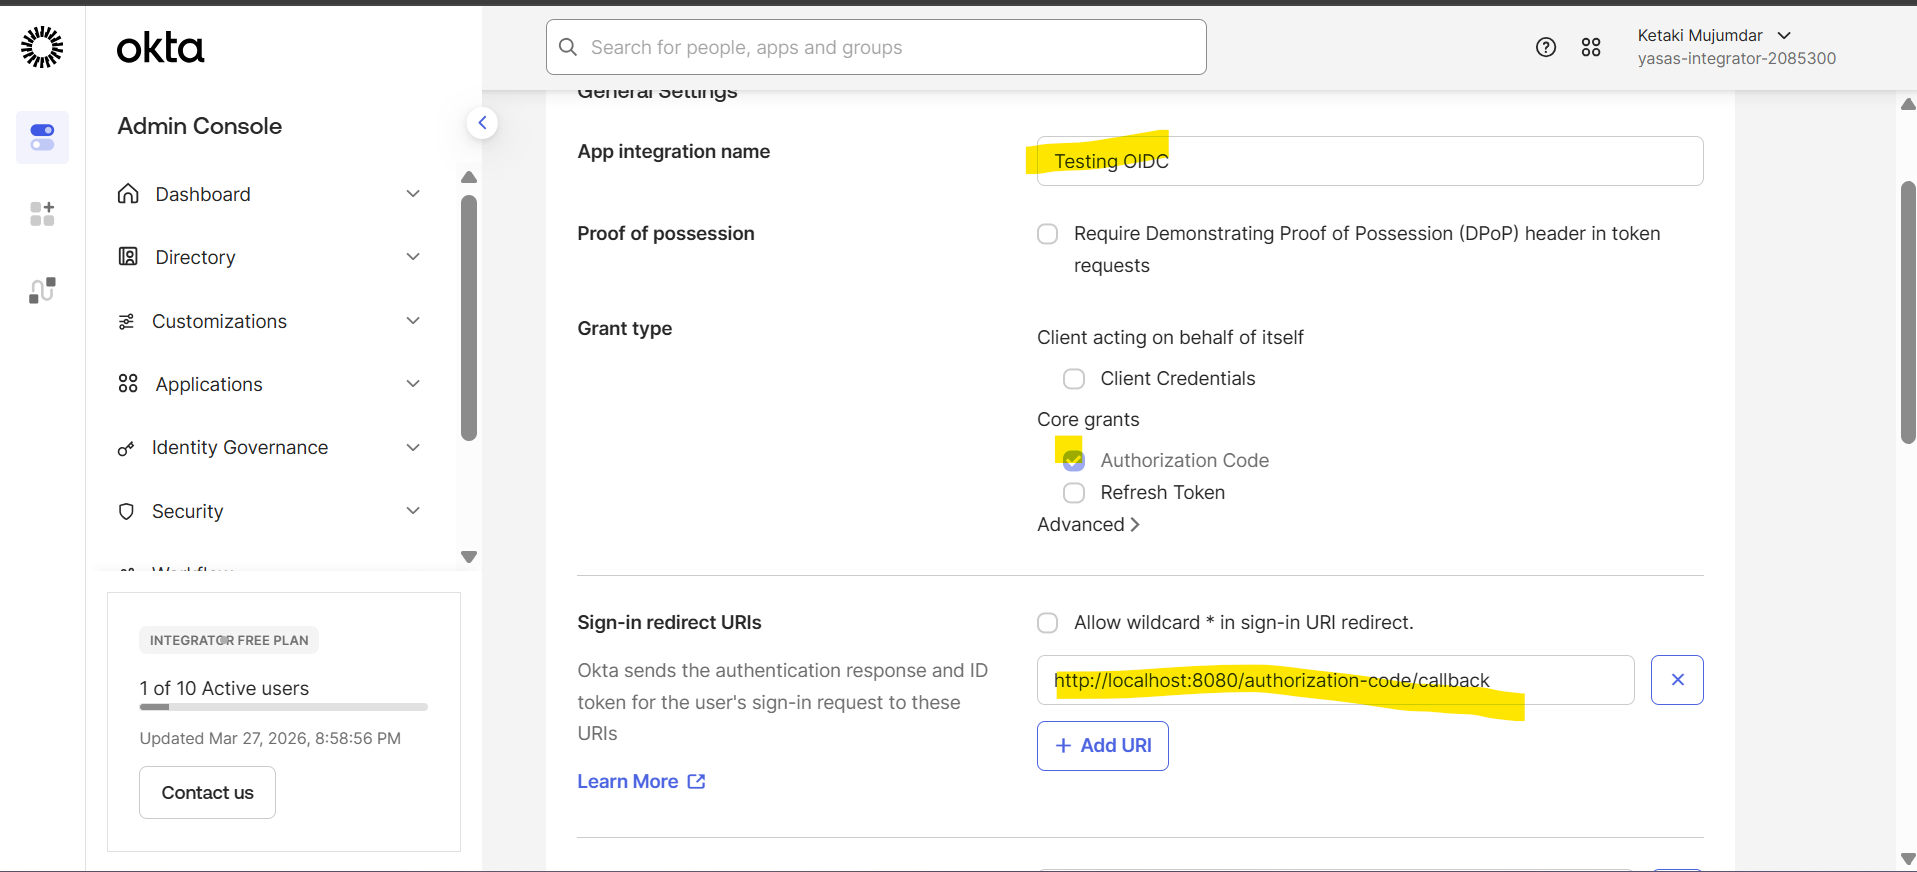
- Provide App Integration name
- Select Grant Type as Authorization Code
- Get the Application Redirect/Callback URI from Siteminder OIDC client configuration
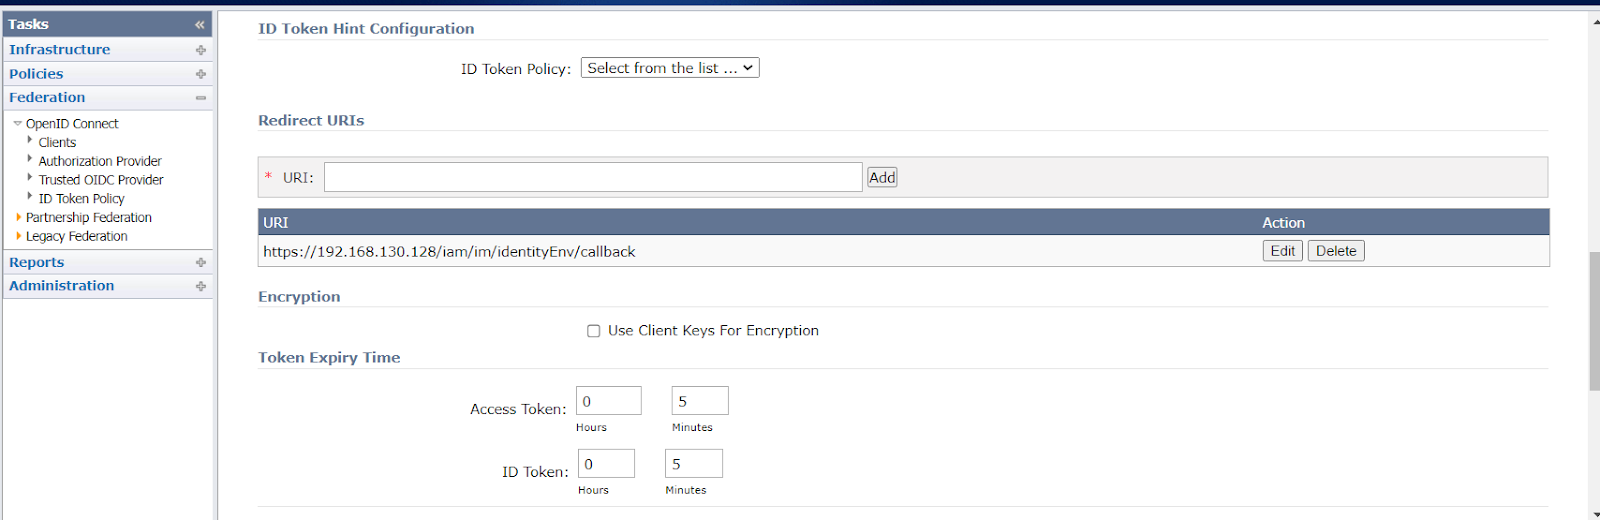
- Provide the same in Sign-in redirect URls
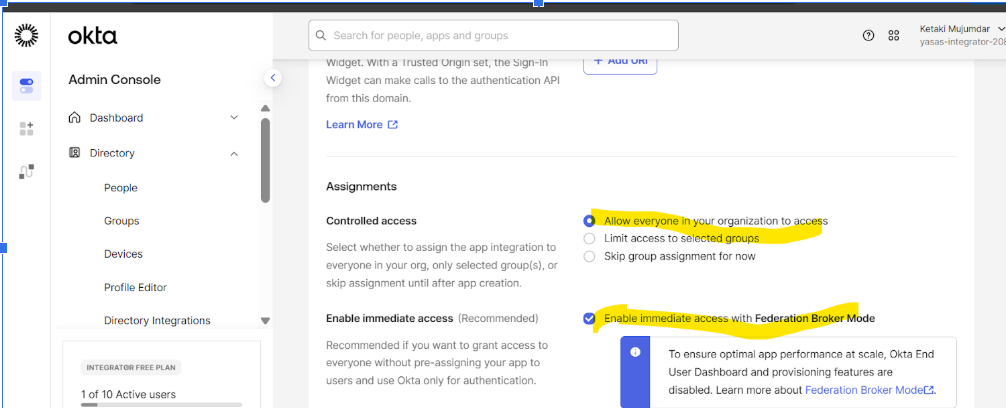
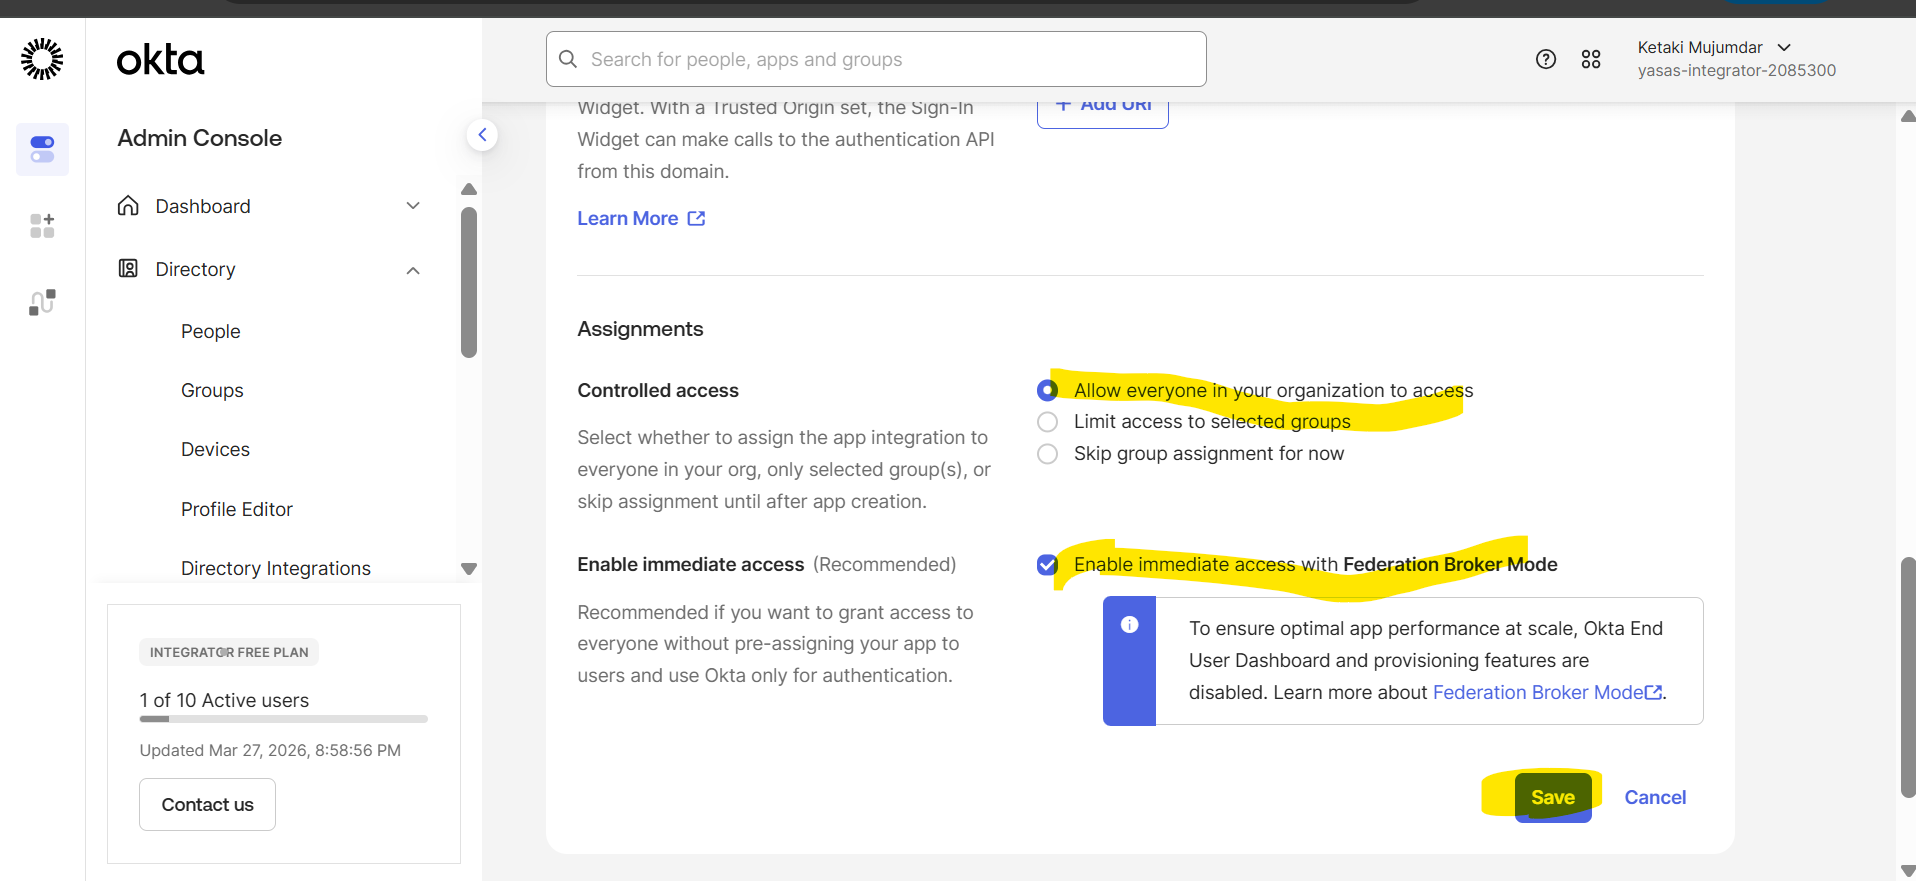
Assignments
- Select appropriate access for the users in Controlled Access
Ex: Select Allow everyone in your organization to access
- Enable immediate access with Federation Broker Mode if immediate access is given to users as they login into Okta
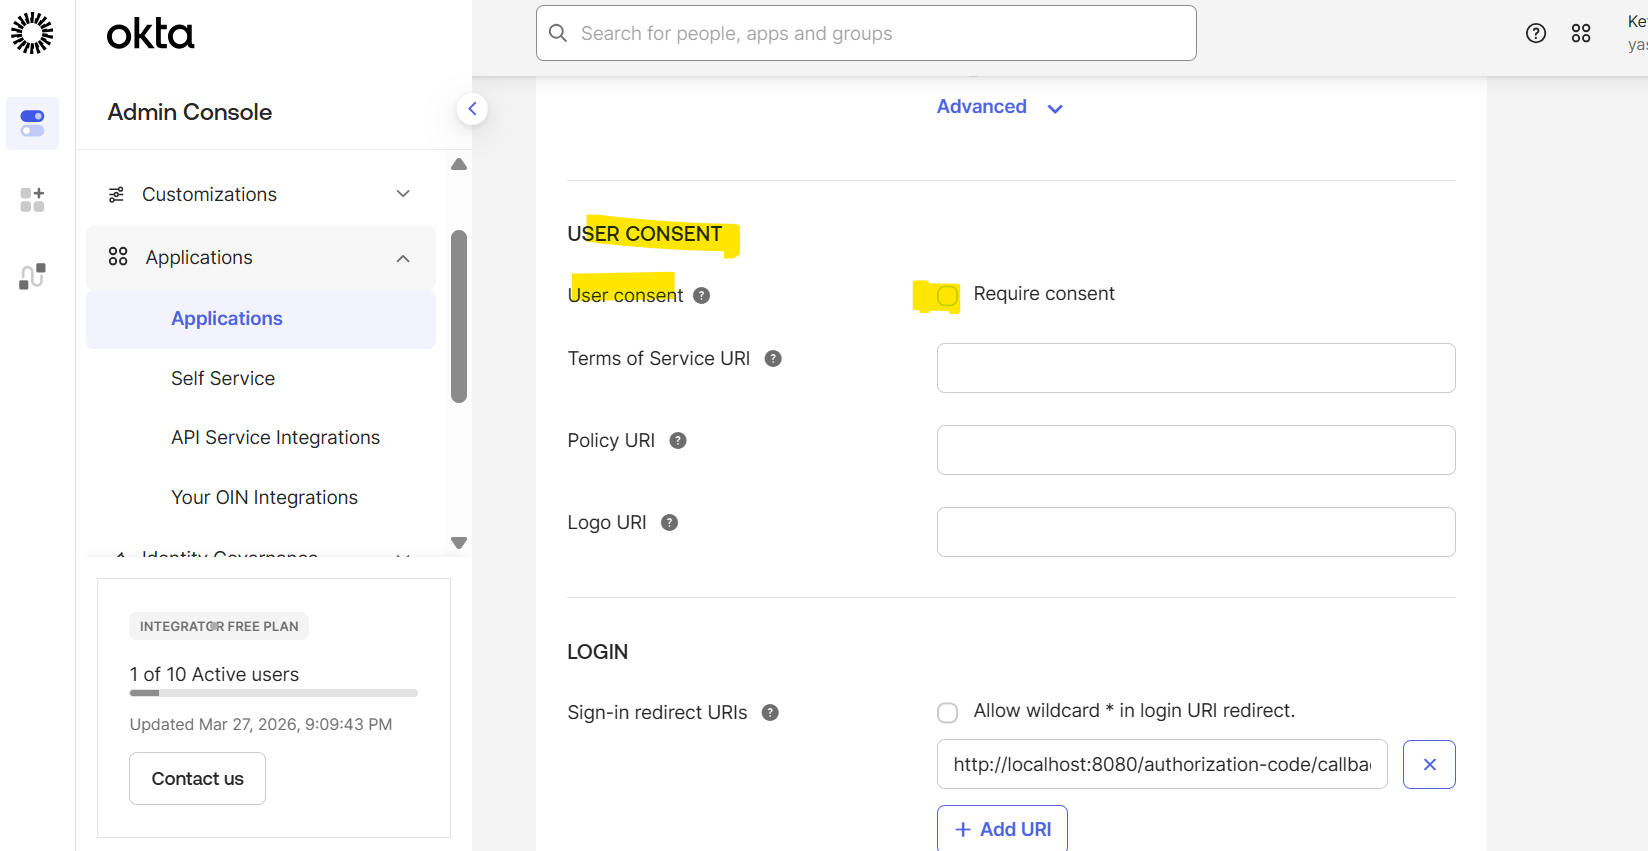
USER CONSENT
- If the OIDC application has been configured to not require User Consent, then the same configuration should be made in Okta.
Click Save
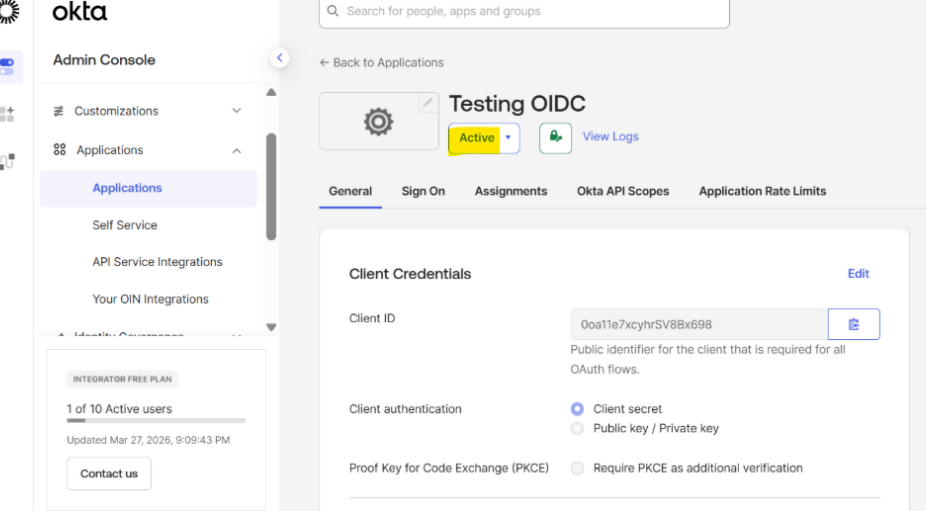
Application is Active
Client ID and Client Secret are created by Okta
Authorization Server
For OIDC applications requiring custom claims, a custom authorization server must be defined

Reference
https://help.okta.com/oie/en-us/content/topics/apps/apps_app_integration_wizard_oidc.htm
Author
Ketaki Mujumdar/Harish Upadhyay